Making a wooden toy car
A friend’s kid recently celebrated her first birthday, so I made her a wooden toy car as a gift. I believe this is a kind of “push toy”. This was the first toy I made. I had a lot of fun with it, and I figured I’d share some process photos here.
Before jumping into this, I want to give a shout-out to Pumping Station: One—Chicago’s oldest and largest hackerspace. I feel lucky to live nearby and be a member. This project involved a lot of tools, and cost aside, I just don’t have the space to have tools like this at home. It’s so nice to have a fully-equipped workshop in the neighborhood.
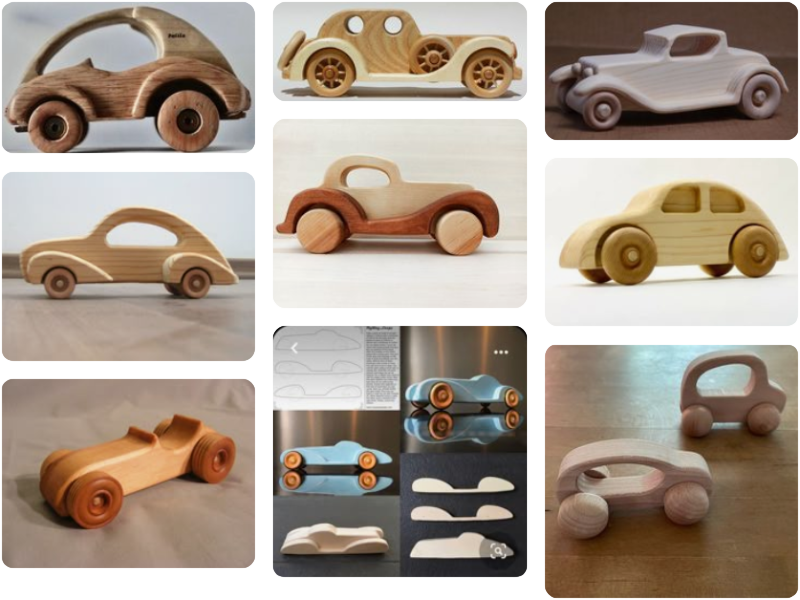
This specific toy is an original design. Out of a desire to keep this toy somewhat unique, I won’t share plan files. There are many similar designs, however. See screenshot of my Pinterest board below. So if you crib my design, I don’t mind.
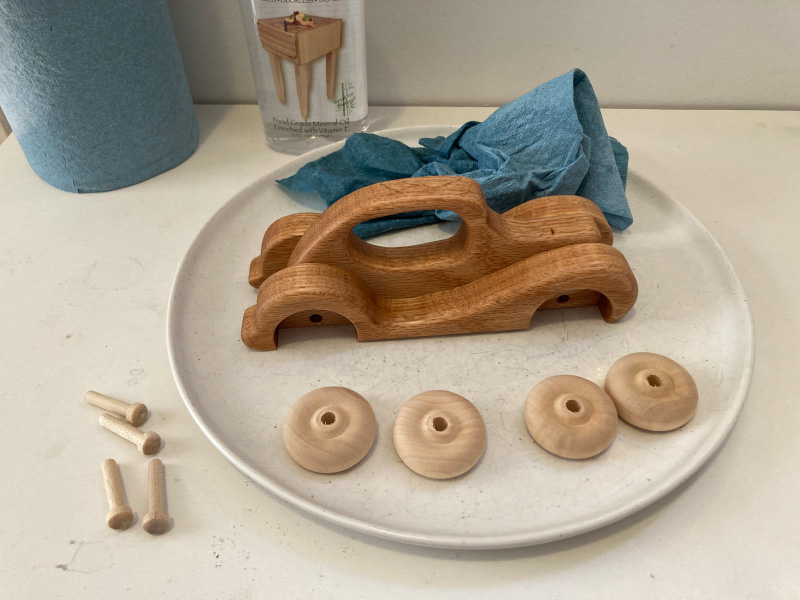
I bought the wheels on Amazon. They are 1.25" in diameter. The board is red oak from Home Depot. It came pre-squared (1x4). This was a rather last-minute project, so I hit the easy button on materials.
In the design, I left 1/4" around the wheels. I believe I also positioned the bottom of the hole for the wheel shaft 1/4" from the bottom. I decided to just use the edge of the board as the bottom of the car.
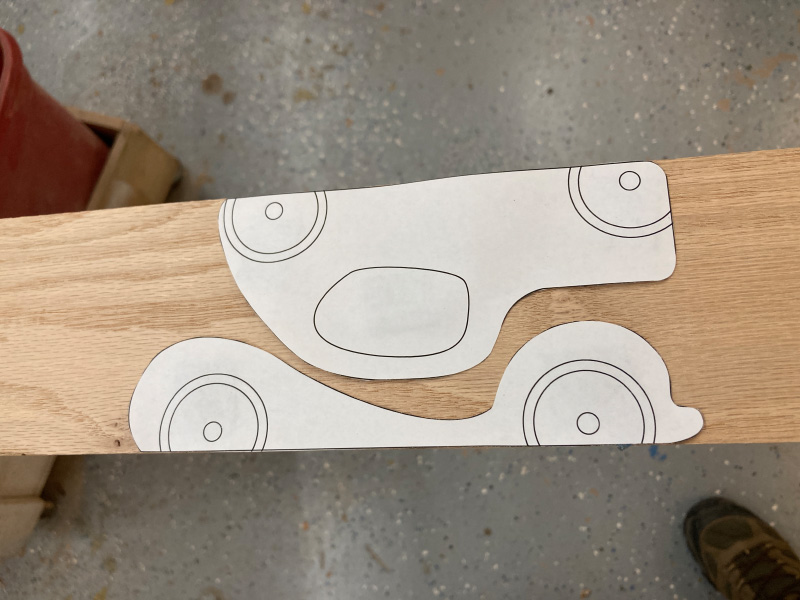
If you make a design like this, remember to print one of the two side pieces mirrored, instead of just printing two copies. You’ll be drilling through the pattern to create the wheel wells, so you want it on the “outside” for both side pieces.
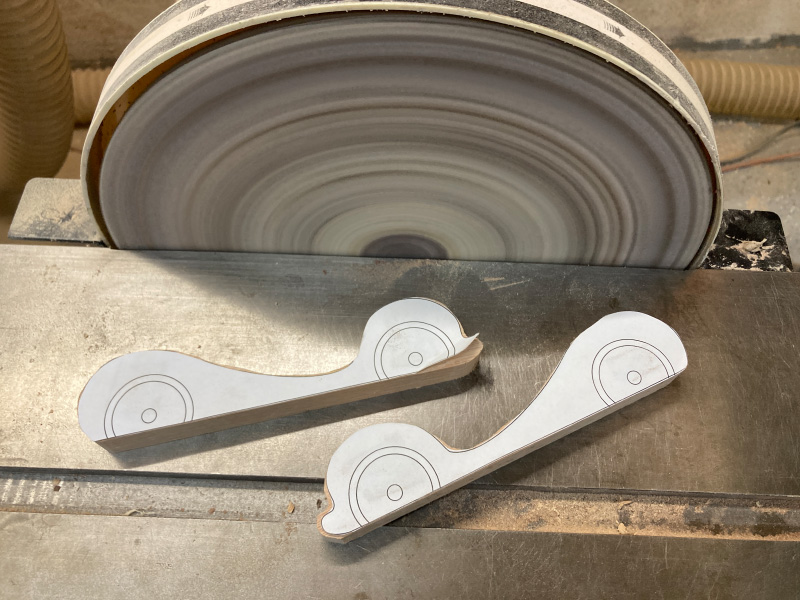
Once the design was ready and printed, I cut it out and taped it to the board with rolled-up painter’s tape. I was worried this might not be enough to hold it, but it worked fine.
I used a scroll saw with a hook-tooth 7 TPI blade to cut out the pattern.
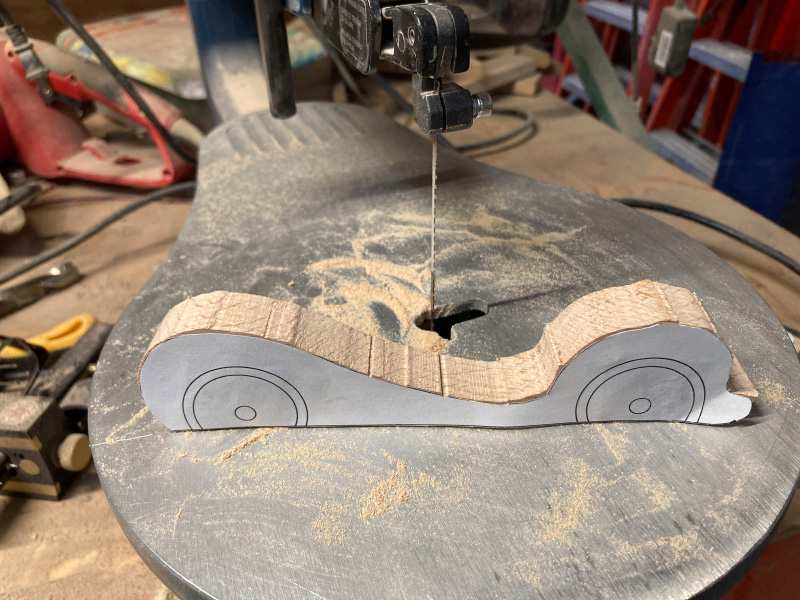
These cuts looked rough, but they cleaned up well in later steps. I found that it’s better to cut oversized and sand down than to cut undersized. For the hollow part of the cabin, I just created a hole with a drill press and fed the saw blade through that.
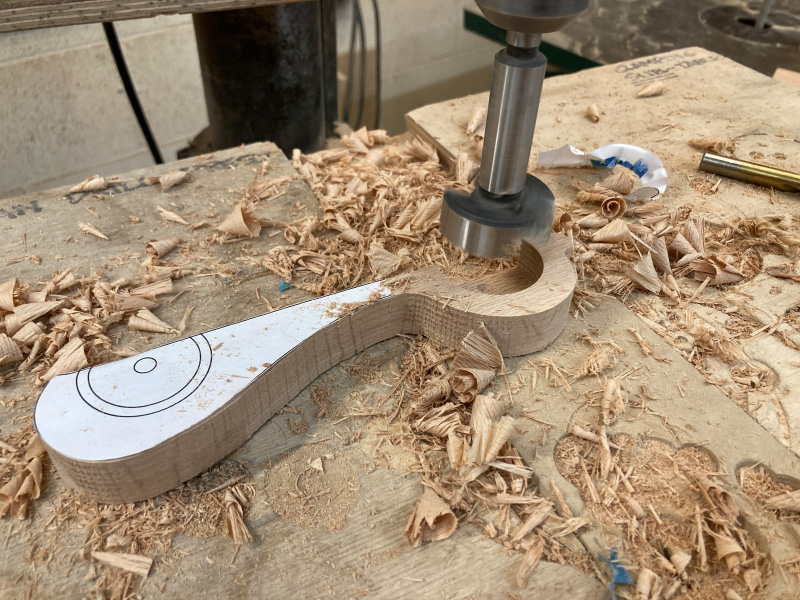
I hit the cut pieces with a disk sander next to round out the big convex parts.
…and a drum sander with various diameters for the rest.
The drum sander did some serious work here. I’ve never appreciated a drum sander as much before this project. Unfortunately, some of the most useful drums at the workshop were in rough condition, and I had no replacement sleeves on hand. I wanted this to be a one-night project, so I made do with somewhat awkwardly-sized drums. I think that if I had fresh sleeves, I’d forgo the disk sander altogether.
To make the side pieces more even, I clamped them together and did a quick pass on the drum sander to even out the biggest miscrepancies.
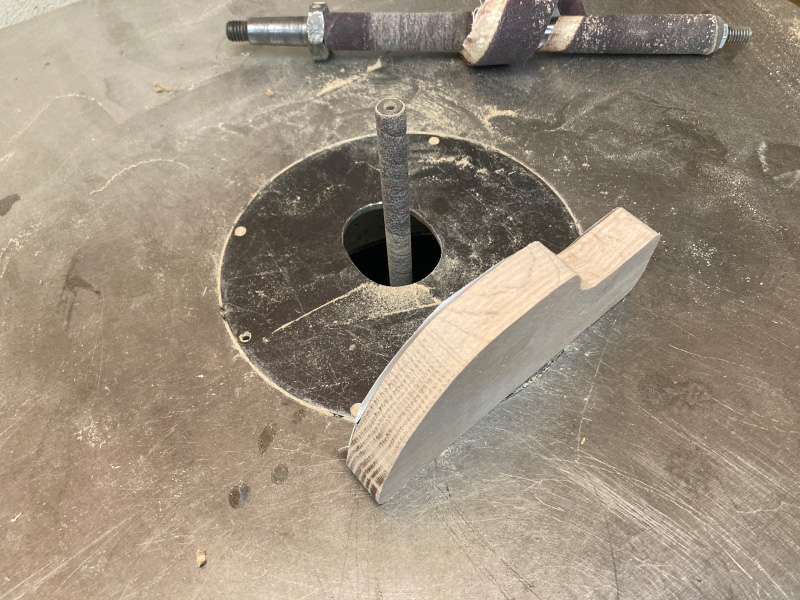
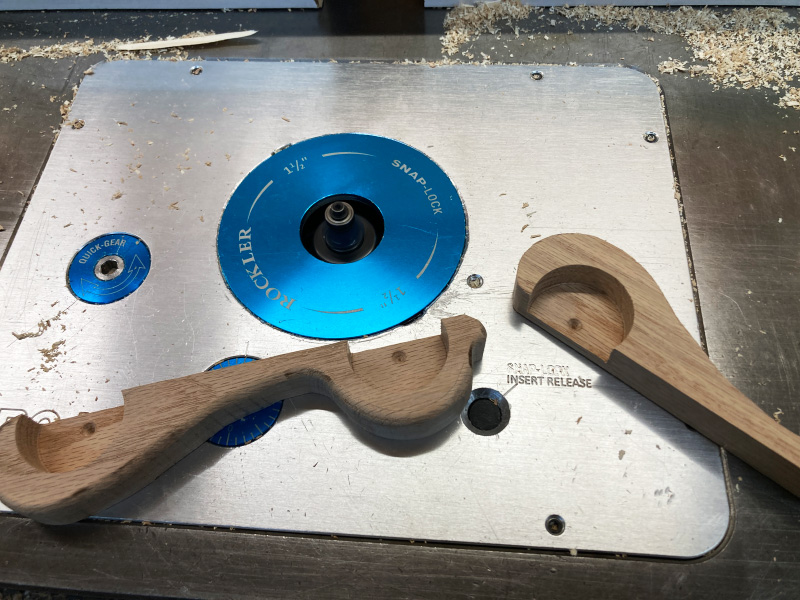
Next, I used a drill press to make the wheel wells with a 1.5" forstner bit.
I made my first mistake here. On my first attempt, I drilled all the way through the side piece. I should have only drilled part of the way through (as shown in the photo above). Recreating the side pieces only took half an hour, but I didn’t feel like I could salvage the originals. For my second try, I used a scrap piece of wood to calibrate how low to drill—just low enough to comfortably fit the wheel with maybe 1/8" clearance to the body.
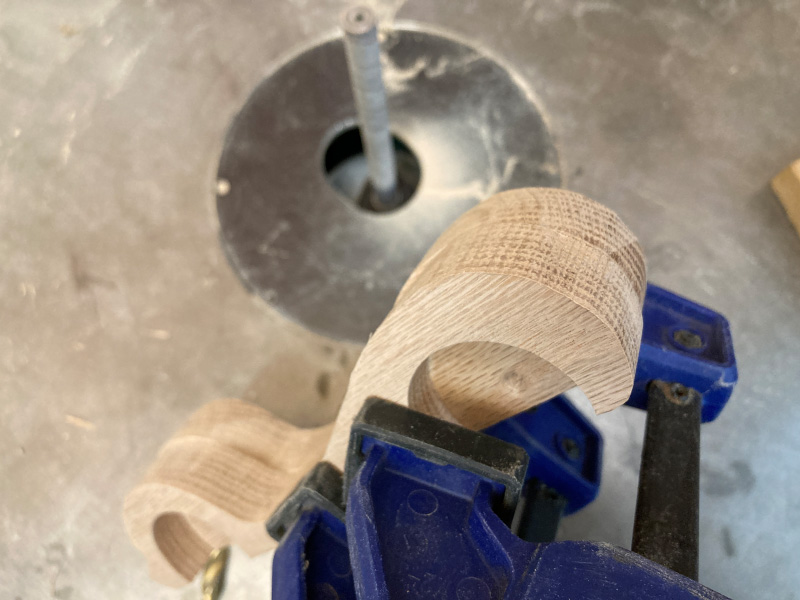
Next, I routed the edges with a ~1/4" roundover bit.
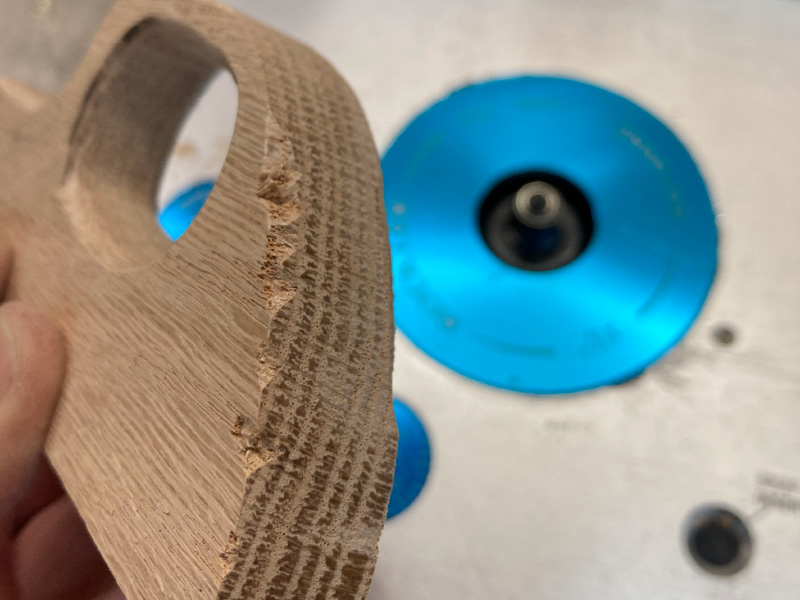
There were two tricky parts to this step. First, I wanted to round-over the inside of the side pieces, but only where they made no contact with the middle piece. I had to eyeball it and start/end the routing partway through the edge.
Secondly, I ran into tearout issues on the end grain. I think I could have mitigated that somewhat if I went slower and got a better angle. But after it happened twice, I stopped trying to route the endgrain and just counted on rounding it over during hand-sanding.
I don’t mind the tearout though: it makes the piece feel more handmade.
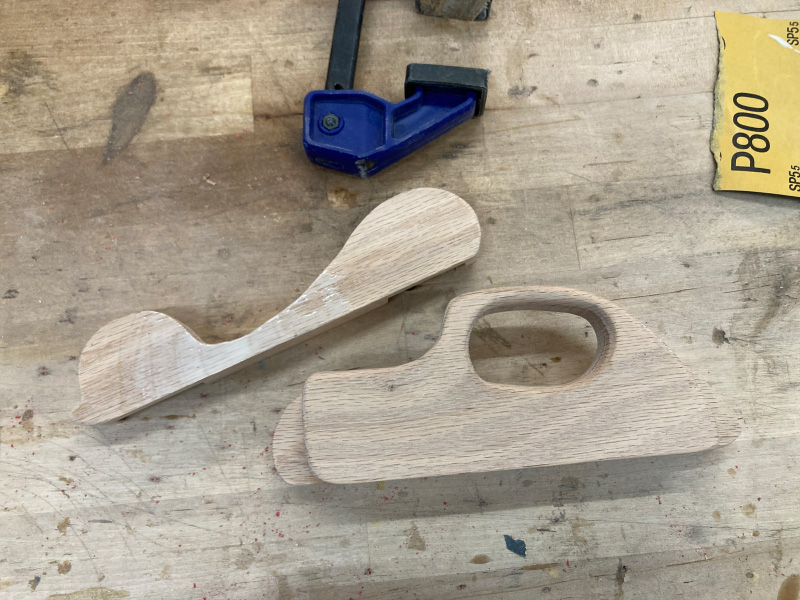
Next step, not shown: lots of hand-sanding. I took the piece through 120, 220, 320, 800, and 1000 grit. The usual recommendation is to only sand through 220, but I’ve always noticed a difference when I went to higher grits, especially on hardwoods. It makes the piece feel so smooth. It doesn’t matter for some finishes (e.g. shellac), but I think it made a difference for this project.
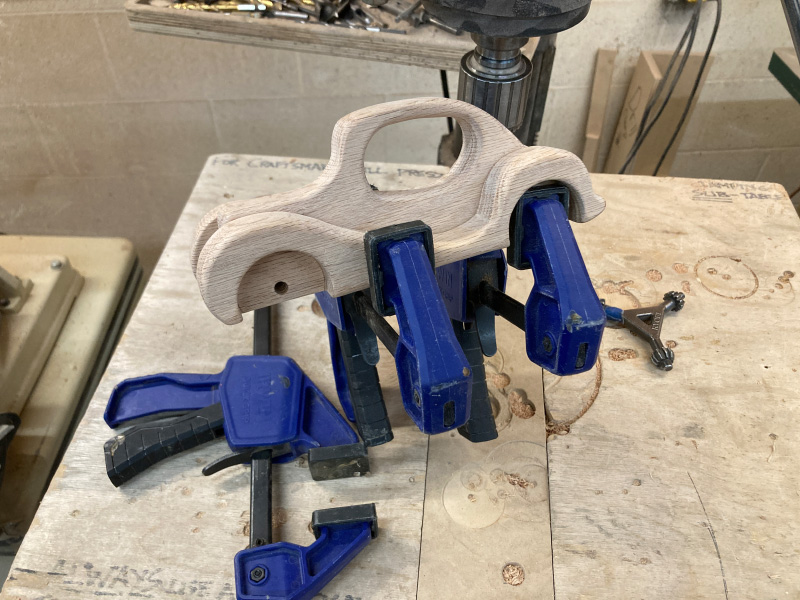
For the glue-up, I had to avoid applying glue onto the areas of the side pieces that stuck out beyond the edges of the middle piece. Any glue on those areas would intefere with finish absorption. I erred on the side of less glue to avoid squeeze-out.
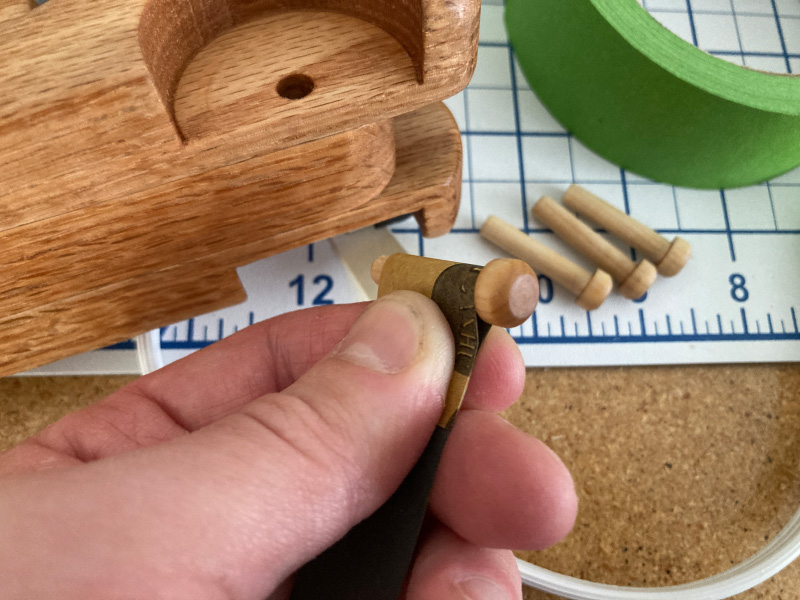
I let the glue sit for about 20-30 minutes. In the meantime, I used a couple scrap pieces to calibrate how deep to drill the holes for the wheel shafts. It ended up being the case that the holes from both sides almost connect: you can see through from one side to another, but there’s a slight narrow ring of wood that prevents the shaft from one side wandering into the other. Feeling lucky about the perfect fit!
After about 30 minutes, I removed the clamps and drilled the holes. Aligning the holes was easy: I just used the divots left by the forstner bit. I re-clamped the car afterwards and left it clamped overnight.
Next day was finishing day. For the finish, I used Howard Cutting Board Oil and Butcher Block Conditioner. I basically followed the instructions on the bottles. The oil is mineral oil, and the conditioner is mineral oil mixed with beeswax and carnauba wax. This is a classic food-safe finish, so it’s safe for a toddler to stick in their mouth. I used this specific product because it was easy to source locally and dried quickly.
The major downside with this finish is that it doesn’t cure. It will rub off over time. The mineral oil will keep the wood from absorbing moisture, and the beeswax will seal the pores. But over time—as the toy gets cleaned with wet wipes—it’ll wear down. It’s easy to restore—just apply more conditioner—but it’s an extra hassle. One of the parents is a woodworker himself, so I figure it’s in good hands, but I don’t like creating extra work.
A minor downside about this finish is that when you first saturate the wood with it, it’ll leak back out for a couple days. It’ll leak more where you handle it. This is also not a big deal: just wipe off the seeping oil, and it’ll eventually stop. But this does mean that you shouldn’t use this finish for a project that’s truly last minute. I had a couple days between finishing and delivery, so it was fine.
If I had more time, I’d try finishing with tung oil cut with citrus solvent instead. This would create a food-safe finish that hardens. I’d want to give it a long time for the solvent to off-gas and for the tung oil to cure, though. At least several weeks, maybe even a couple months for my first time. Something for the holidays, maybe.
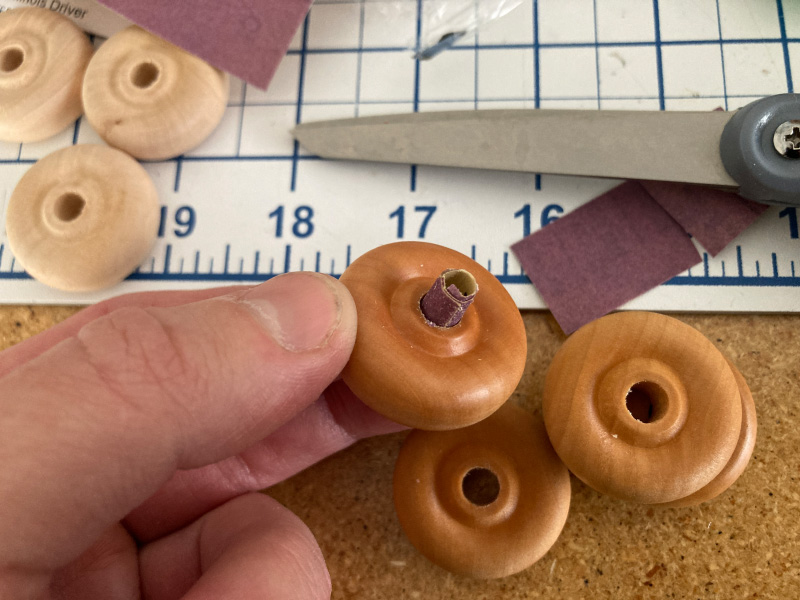
In the photo above, I’m actually getting ready to apply oil to the wrong size of wheels. Those are 1.5" not 1.25". I ordered a couple different sizes… and I have many left-over. Definitely will be making more toys like this in the future.
I found that some wheels turned darker than others once the finish was applied. I don’t have a good photo to illustrate, but after I noticed this effect, I ended up applying finish to about 12 wheels, and grouping them together into matching shades. I decided to use a group of wheels with a lighter coloration for this car.
Once everything was dry, it was time to glue in the wheels. Before doing so, I sanded the inside of the wheels and the shafts to ensure they turned smoothly. Honestly, I don’t think it did much, but it’s nice to have the sense that I did everything I felt like I should have done for this project.
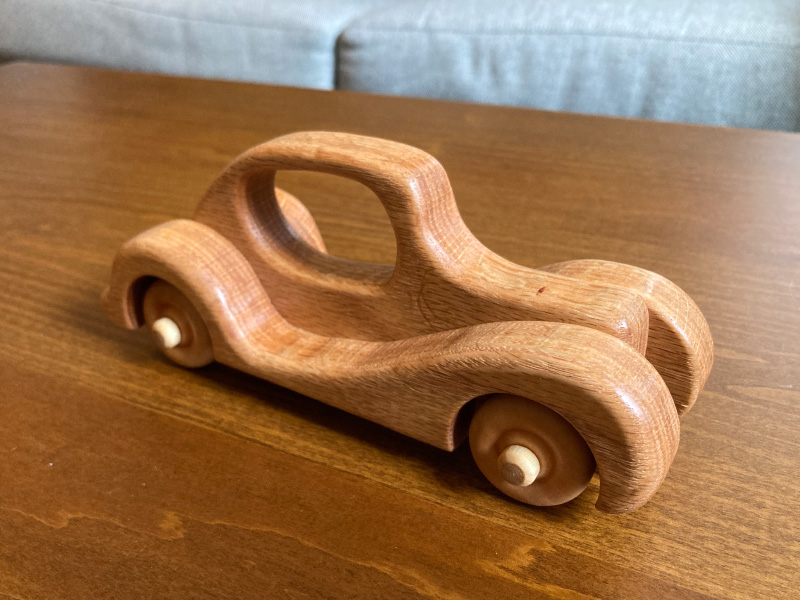
A bit of glue, and that’s that! Here’s the finished car from a few more angles.
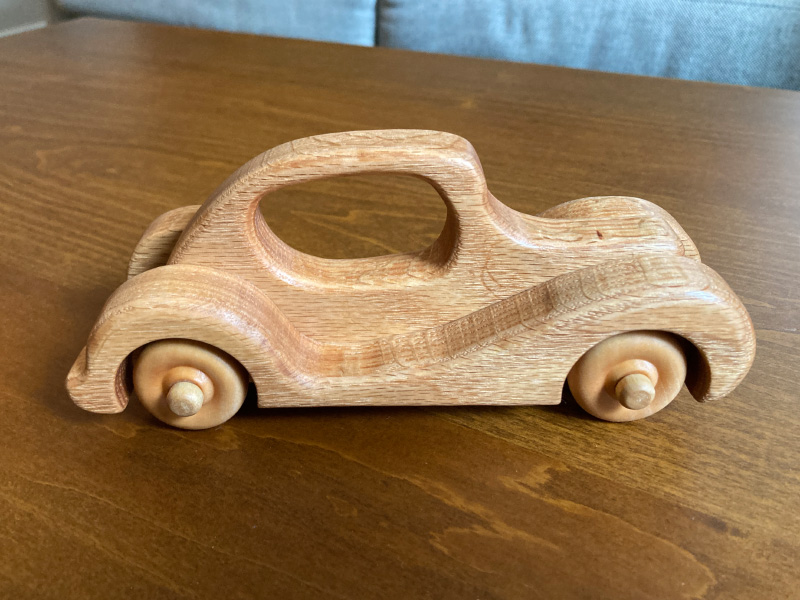


In real life, it has a reddish or amber coloration that’s difficult to capture in photos. These photos do a good job of conveying what the surface “feels” like though. With the smoothness and the natural finish, it’s a satisfying object to hold. Anyway. I like how it turned out. I hope the recipient does, too.
I’ll definitely be making more wooden toys in the future. I’m getting to that age where my friends are starting to have kids. I don’t think I’d make a good Santa, but I look forward to supplying whoever plays the part with toys that feel like they were made at Santa’s Workshop. “Workaholic elf” is a vibe I can relate to. ☕