Converting a theater seat into a chair
The Music Box is a historic movie theater in Chicago, established in 1929. It would not be much of a stretch to say that they are a cultural keystone of Chicago’s north side. If you are a cinephile who lives in Chicago—or are good friends with one, spoiler alert—chances are you’ve been here many times. If not, you owe it to yourself to go.

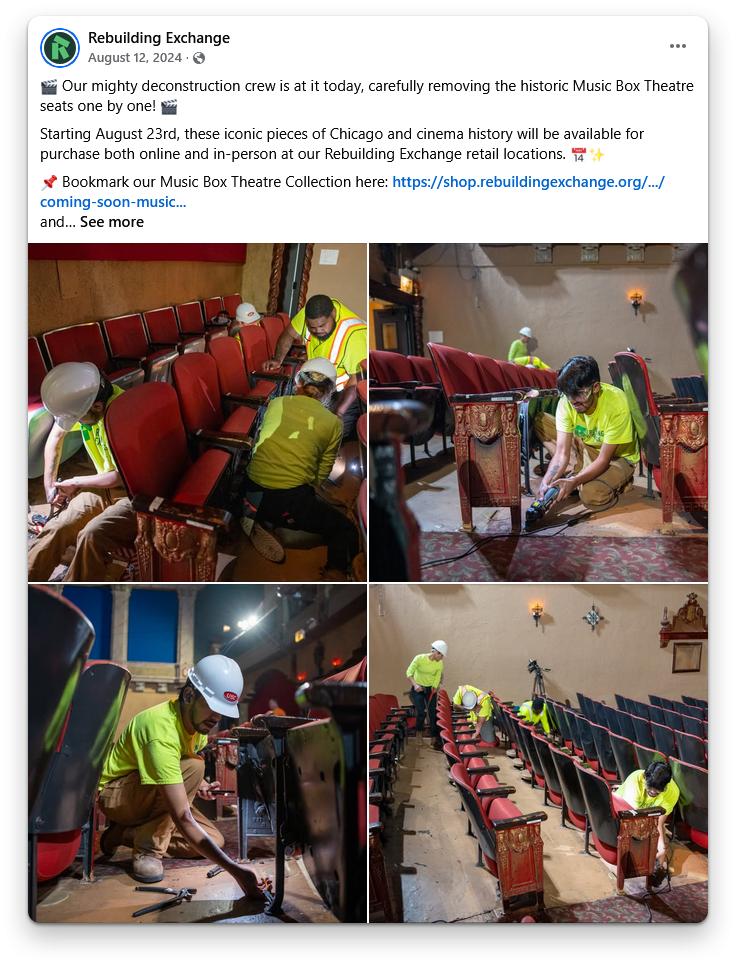
The Music Box underwent a major renovation in 2024, which included replacing over 700 seats in the main auditorium. They partnered with Rebuilding Exchange to salvage the old seats. For about a month, these seats were available for sale via their website:
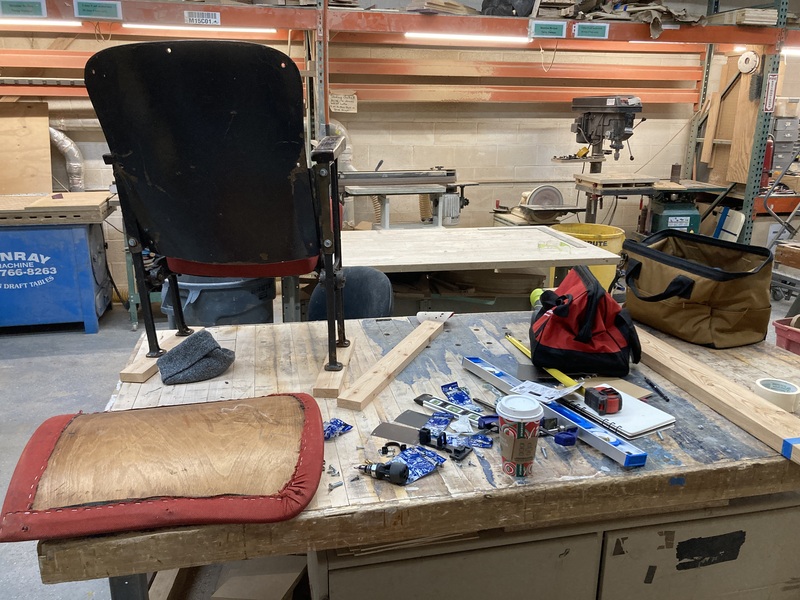
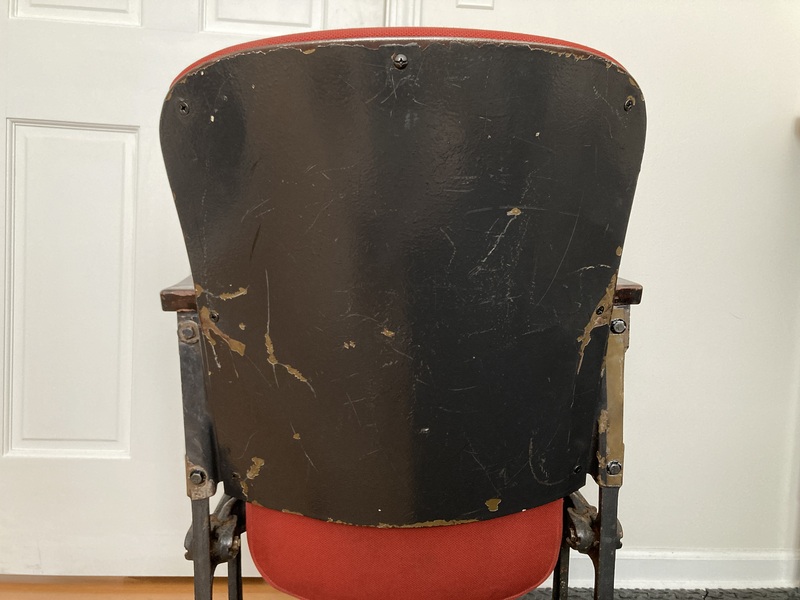
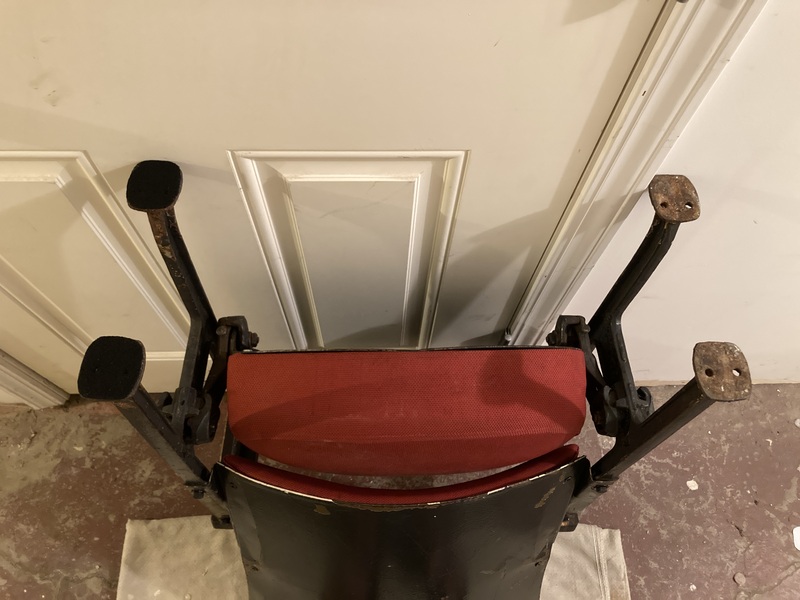
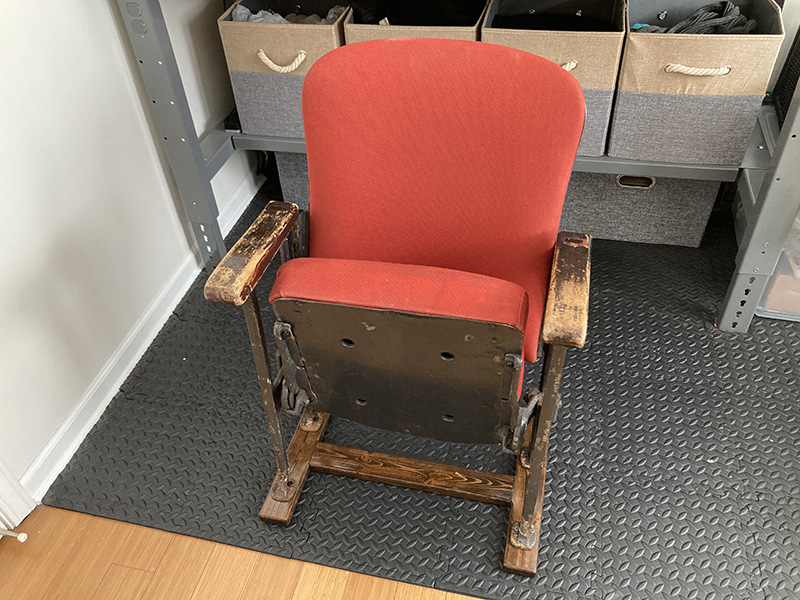
My friend, who is a huge film buff and longtime fan of the Music Box, bought one of those salvaged seats. Here he is, shortly after we got the prize back to his place:

Unfortunately, that seat didn’t stay there for long. My friend recruited me to build a base for it, but as we dug into the project, we discovered several structural issues. The seat was relegated to my basement as other projects took priority. “Has it really been a year? Wow, time flies. This is what growing old must feel like,” we joked. My friend has been nothing but patient, but in August 2025, it was time to finish this thing.
The initial brief was simple: build a base for the seat to turn it into a chair. In movie theaters, seats are bolted to the floor. Once removed, this seat lost much of its structural stability, and its design made it far too easy to tip back to the point of falling. Adding a base would fix both issues.
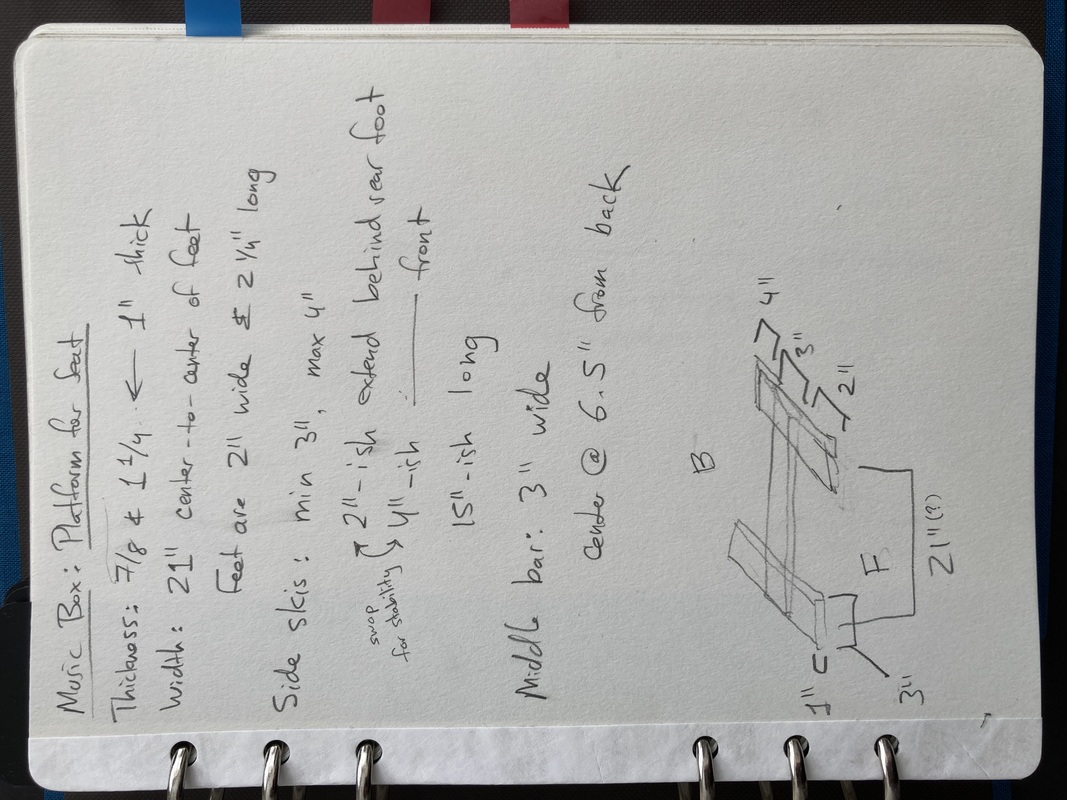
I drafted a design with two runners and a crossbar. The runners would extend as far as the armrests in the front, but further in the back, so as to prevent tipping. The crossbar would attach to the runners via half-lap joints. The seat would attach to the runners via 1/4" bolts, with nuts and washers hidden inside Forstner-bit holes in the bottom of the runners. I got some reclaimed lumber from Rebuilding Exchange and roughed out the build in an evening.
This is where the problems started. Making the side runners was easy, but to make the crossbar, I’d need to know the exact distance between the runners, and the width of the seat proved to be much less “static” than I expected.
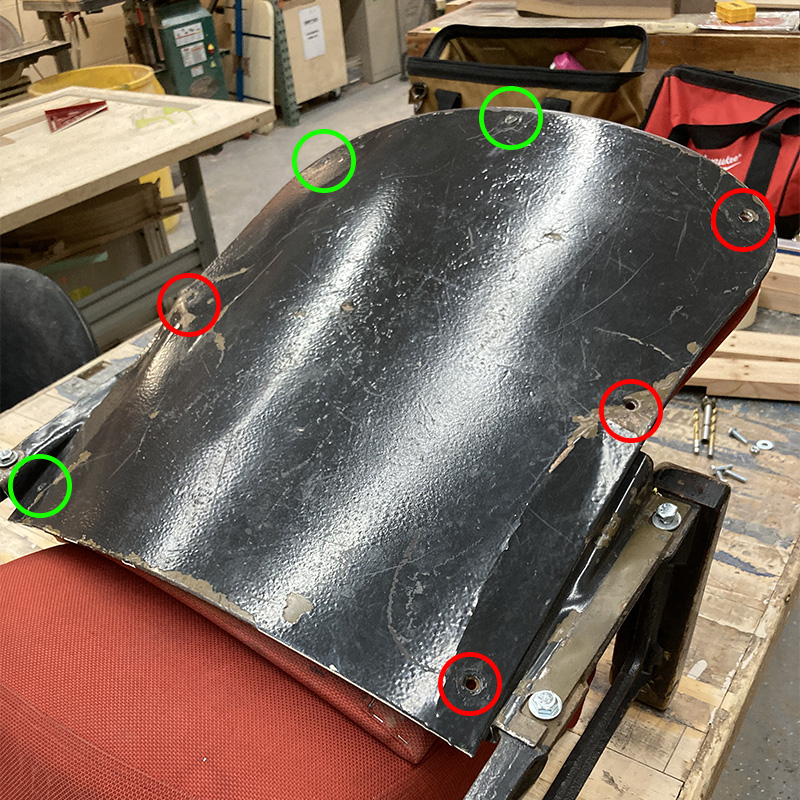
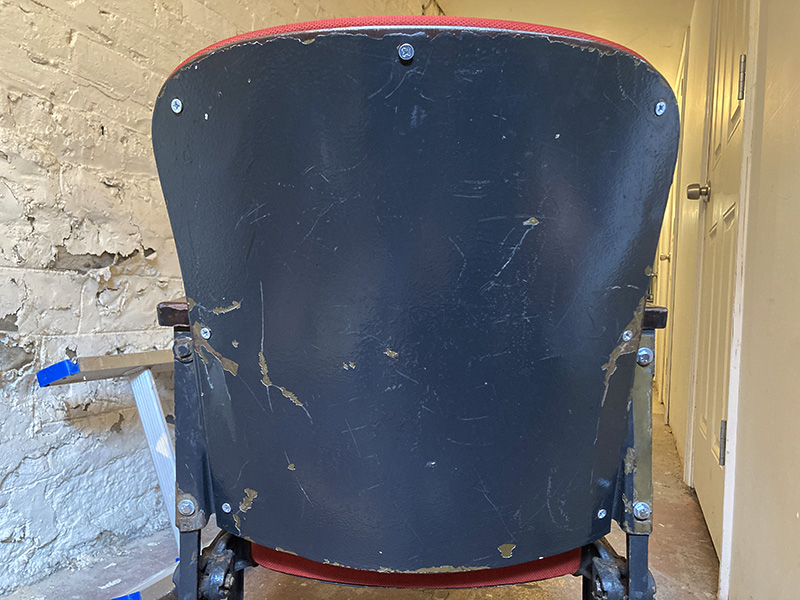
This was due to several factors, but the most important one was how the seat back was designed. The seat back was made of two parts: a curved sheet of metal that joined the sides of the chair, and a piece of upholstered plywood that attached to the metal via wood screws. Without the plywood fully attached, the metal acted as a spring that pushed the two sides of the chair apart.
When we received the chair, four of those seven screws were missing.
Try as I might, I could not get any wood screws to stay in the screw holes. I suspected that the holes were stripped to the point of failure. To find out, I’d have to partially remove the upholstery on the chair. That’s where the project stalled. I didn’t have the right tools, and the holidays were just around the corner.
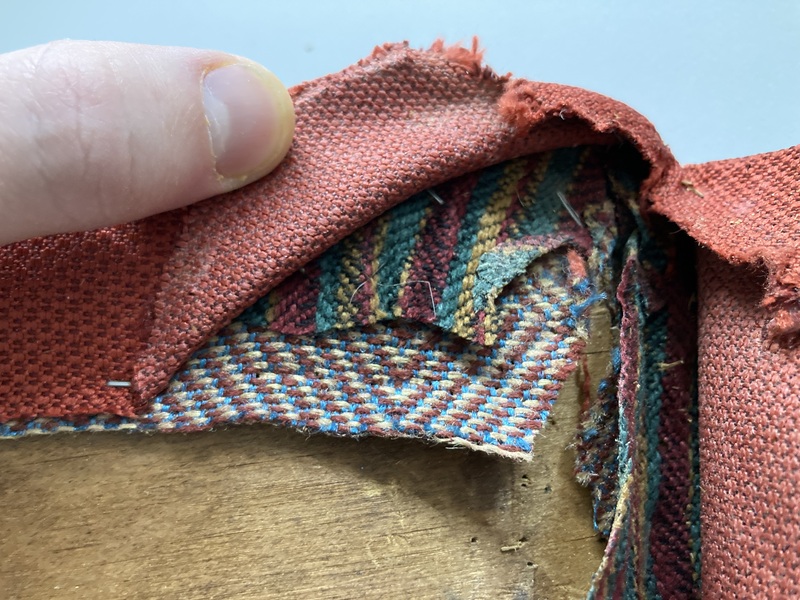
Two months later, my friend and I investigated what the upholstery was hiding. We found something neat. The seat has been reupholstered several times—and they just kept adding layers! It felt like we were doing an archaeological dig and getting a peek into movie theater styles across the decades. I wonder what year each layer dates to?
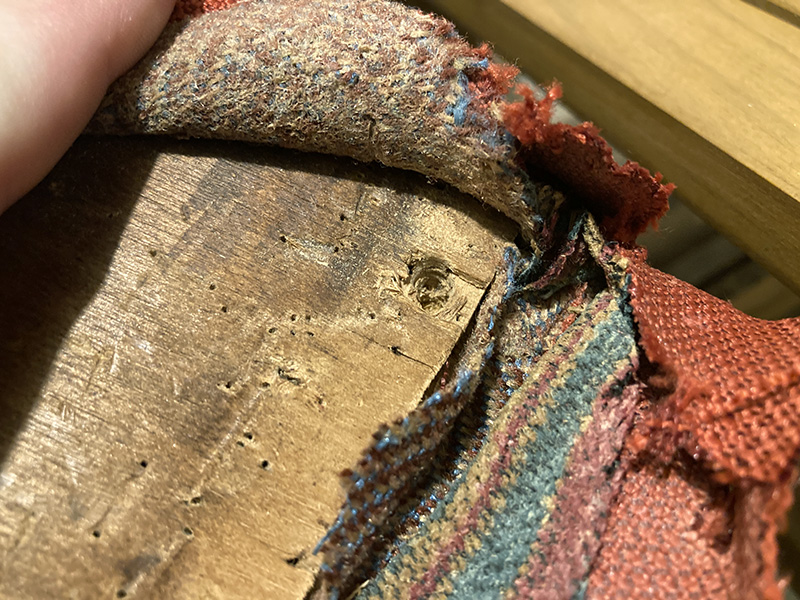
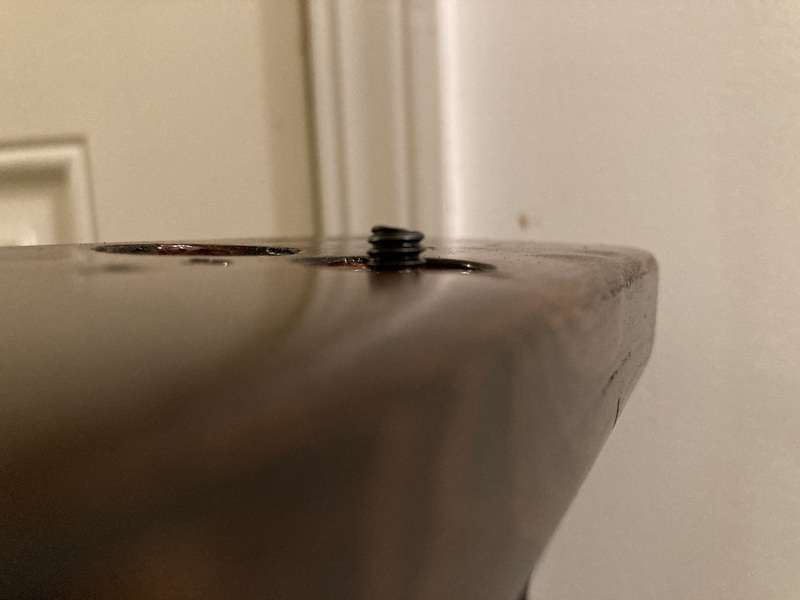
…and yeah, those screw holes were totally busted:
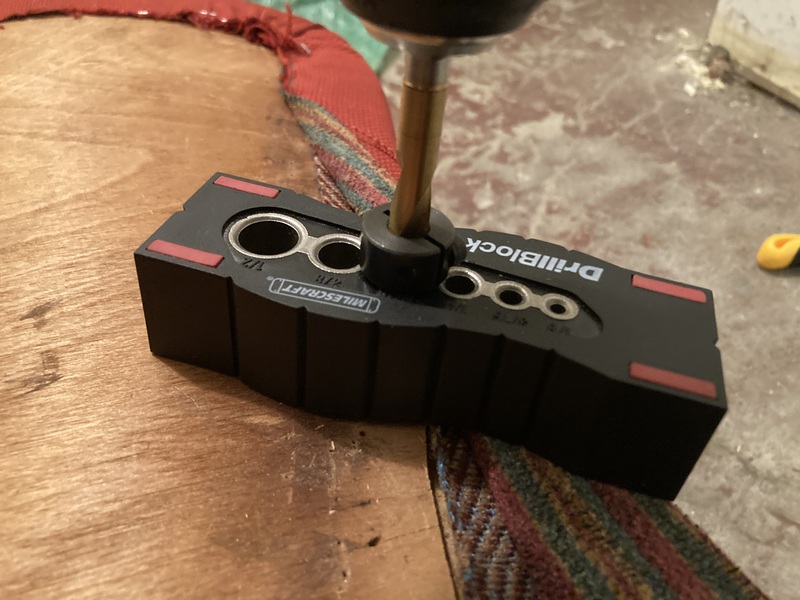
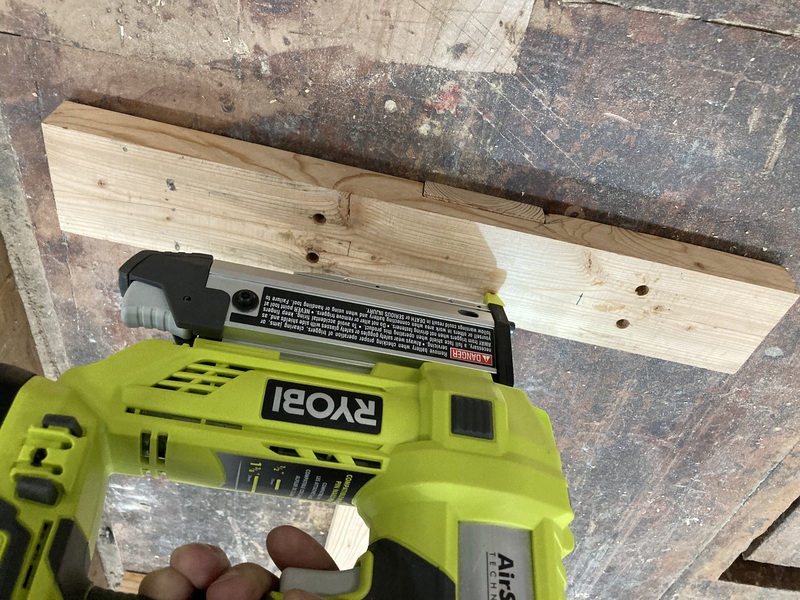
Fast-forward six months. I’ve obtained a threaded wood insert kit and built up the courage to drill out the holes even more. My need to get the project done eventually outweighed the fear of ruining what might be 95-year-old plywood, so one evening in August 2025, I just went for it.
I used a drill block and a stop collar. Here’s a reenactment of the setup:
…and here’s a photo of the result:
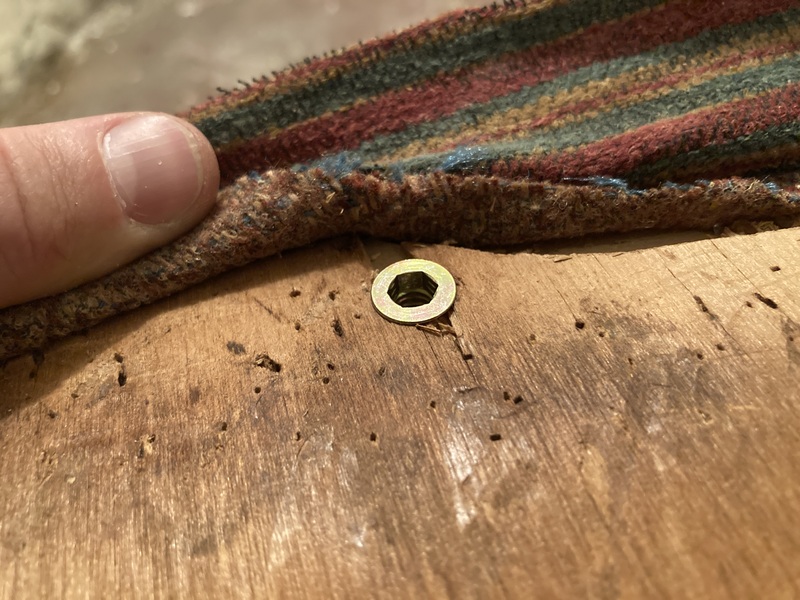
Thankfully, it turned out great. All but one of the threaded inserts are rock-solid, and the troublesome one is near the bottom and still works just fine. I used 1/4"-20 hardware: 15mm inserts and 3/4" flat head screws. The drill holes were maybe just a bit too tight at 5/16"—the wood made some concerning sounds as the inserts went in but did not split. Here’s hoping it stays that way throughout the years.
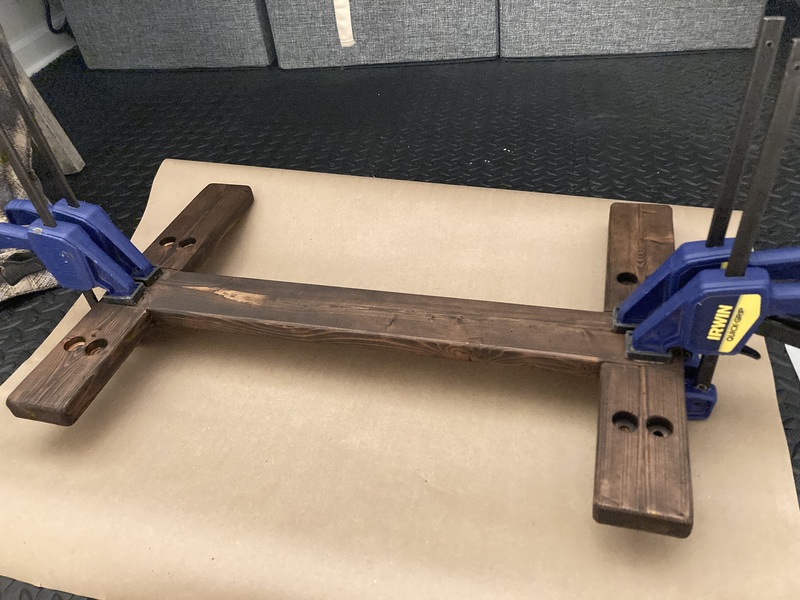
The process of re-attaching the back was also challenging. The metal refused to bend to match the plywood. I had to clamp the metal to the seat back (with pieces of wood to distribute the force) before I could screw the two together.
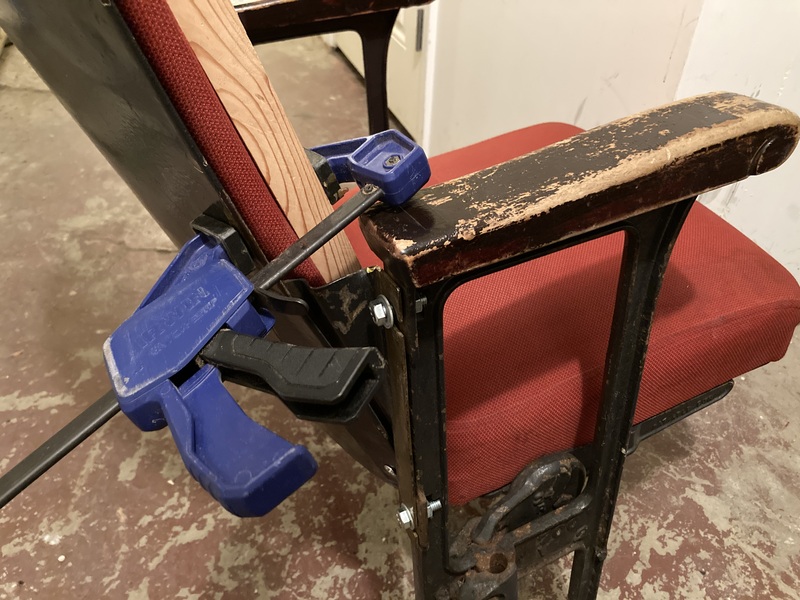
I felt lucky that the screw holes in the metal aligned with the new wood inserts. One was just off enough to prevent a flat-top countersunk screw from going in correctly. I later swapped that screw to a 5/8" long dome-top.
With the back in place, it was easy to figure out a length for the crossbar. I flipped the runners upside down, put the overlong crossbar into the dados, put some bolts through the legs to hold them in place, loosened the bolts holding the sides in place, and basically jostled the chair until everything measured more or less square.
I landed on 22" as the right length for the crossbar, given 3" wide runners. I finished the half-lap joints, cut the crossbar to size, and inserted a couple pin nails on each side for a temporary hold.
Then, I ran it through a router with some roundover bits. I gave it a smaller fillet on the bottom than the top. I can’t recall what sizes I used: maybe 1/4" and 5/16"?

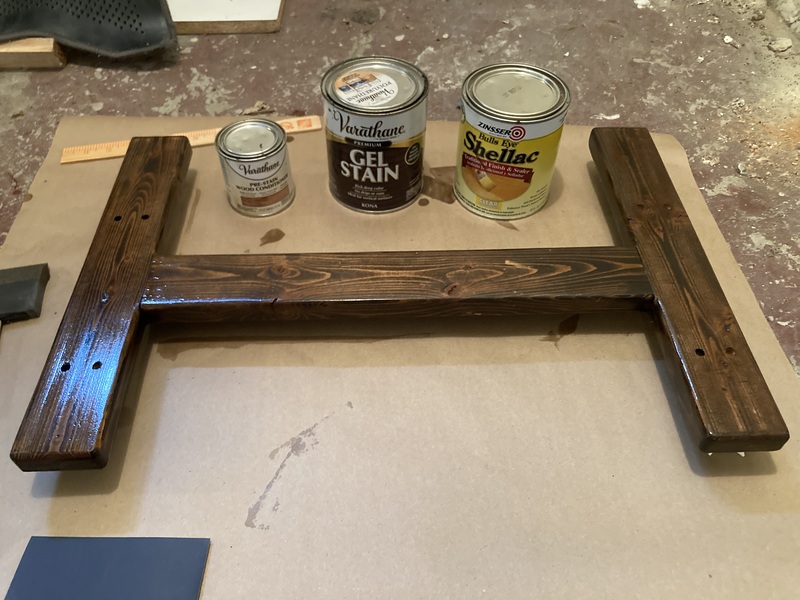
I removed the pin nails, sanded it to 120 grit, applied wood conditioner, waited 15 min, applied gel stain, waited overnight, glued and clamped it, and gave it all another day to cure.
Then, I applied about three coats of shellac on all sides.
I learned an important lesson here. Shellac is supposed to be dry to the touch within 30 minutes, and hardened to fingernail marks within a few hours. However, my shellac has been sitting around for several years. I’m pretty sure it’s gone bad. After several days of drying, if I handled the wood barehanded, I left slight fingerprint marks on the finish. It’s fine, since no one will be handling this or getting close to it, but that’s just not good.
In the spirit of salvage, one of my goals with this project was to use up existing supplies rather than buying new ones, but I learned that shellac has a shelf life. Next time, I’ll just buy flakes and mix only as much as I need for a given project, rather than using pre-mixed shellac from the store.
While waiting (and hoping) for the shellac to cure, I decided to tackle a different aspect of the project. I did not like the fact that the hardware was silver in color. It had an unpleasant contrast with the black paint, and it was immediately obvious at a glance that the chair was restored.
I decided to turn the hardware black. I used muriatic acid to strip the zinc coating, neutralized it, then used Birchwood Casey Super Blue to turn the hardware black. Per some advice I read somewhere, I left the hardware to soak in oil overnight afterwards, which is supposed to help lock in the bluing solution.
I don’t have photos of the process (handling muriatic acid is stressful enough), but I do have photos of the result. I think the difference is dramatic:
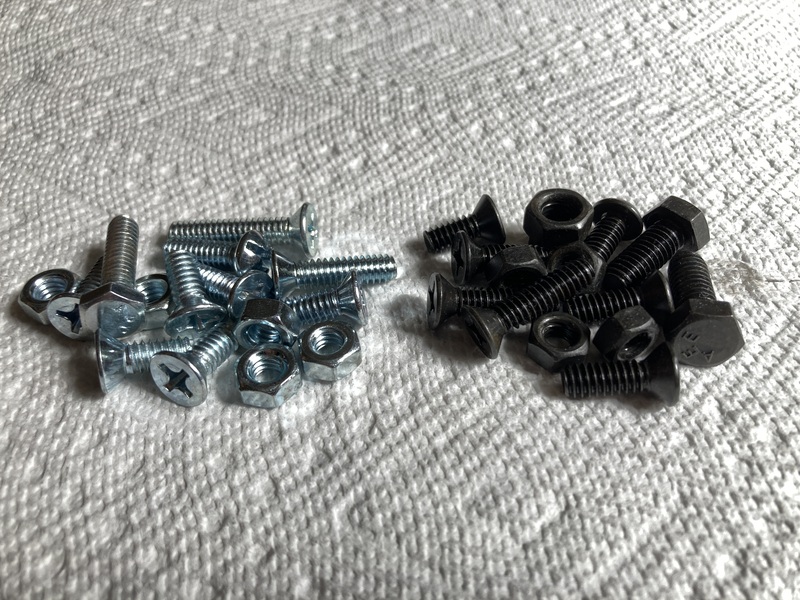
Was it worth the hassle? It made a night-and-day difference for the chair, in my opinion:
But would I do it again? Almost certainly not. I’d rather pay Uncle Bezos like $50 and get enough black oxide hardware to last me a lifetime of projects. In the spirit of salvage, it was a fun thing to try, but stripping zinc with muriatic acid is just too stressful and makes too much of a mess.
Even after all the hassle, I had to color some hardware black with nail polish, which I was trying to avoid because I think it produces a sub-par result. I lost a screw, I forgot to treat the washers, and I overlooked the hardware on the bottom of the seat. It sucks that online shopping forces you to buy like 300 fasteners for the math to work, but by the time I was done, I wished I had that extra hardware laying around.
It was tricky to identify what length of 1/4" bolts would make for a secure hold while being short enough to not stick out of the runners and into the floor. I went with 1 1/4" and cut them down to about 1 1/8" using a bandsaw and a grinding wheel. I might have gotten away with 1" and some Loctite threadlocker.
Despite my efforts to secure the bolts during cutting, one got yeeted somewhere in the workshop by the bandsaw, and I was not able to find it. I have no photographic evidence of my due diligence, but trust me, it was there. Somewhere.
Before assembling the chair, I added some felt gaskets to the legs to protect the finish on the runners. There was not much point to doing so—I think my main motivation was vanity. I had some felt laying around, so why not? I didn’t bother cleaning off the rust.
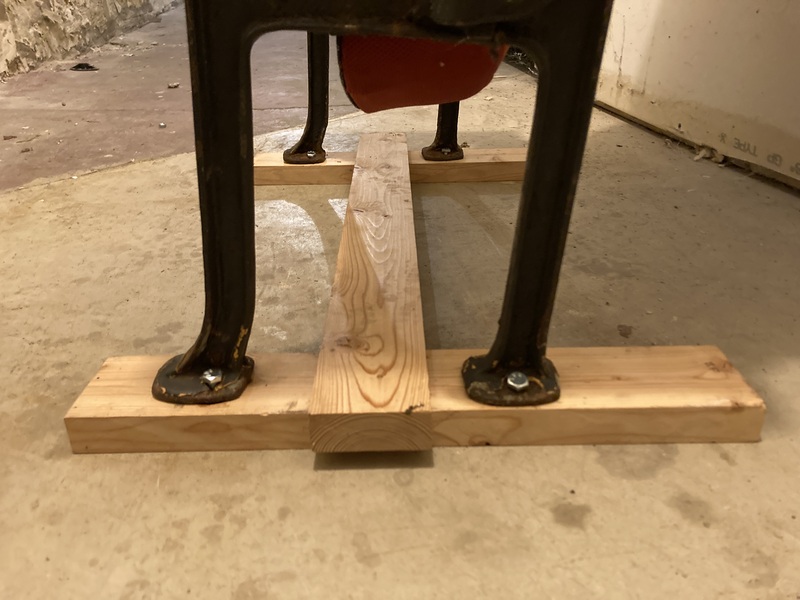
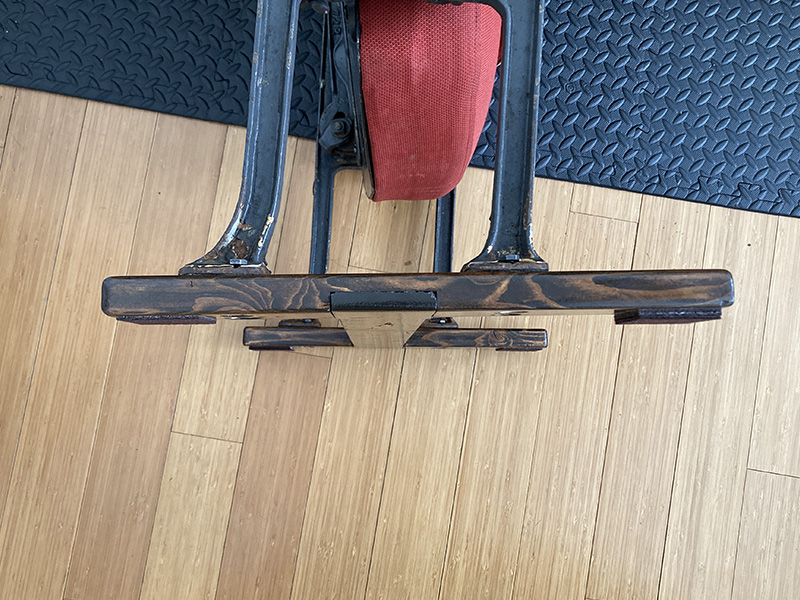
Here’s what the chair base looked like once assembled:
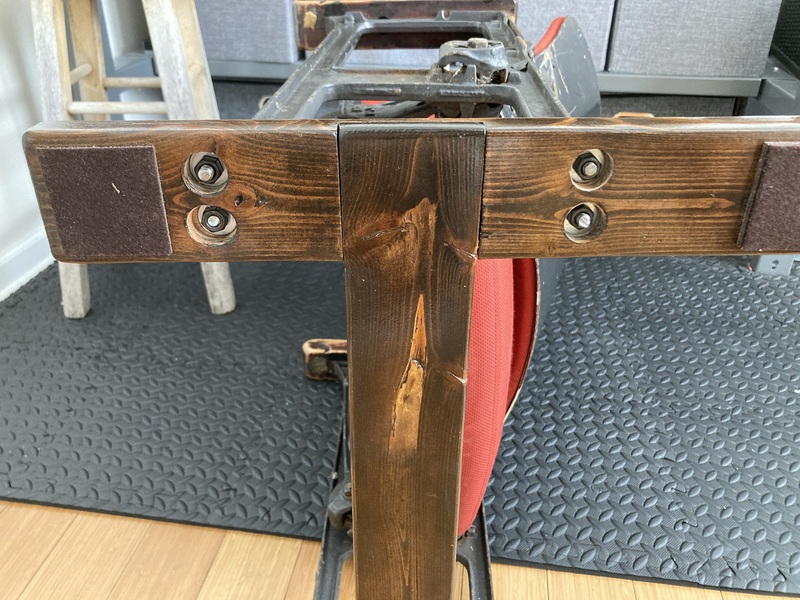
I added 2" square felt furniture pads to each corner of the base. Note how the rear of the runner in the photo above has more pads than the front. Before I attached the base, it was almost perfectly flat. But once attached, it was twisted! It seems that the spring forces in the chair are great enough to bend the wood of the base, just enough to be noticeable. Adding more pads to one corner stopped it from rocking.
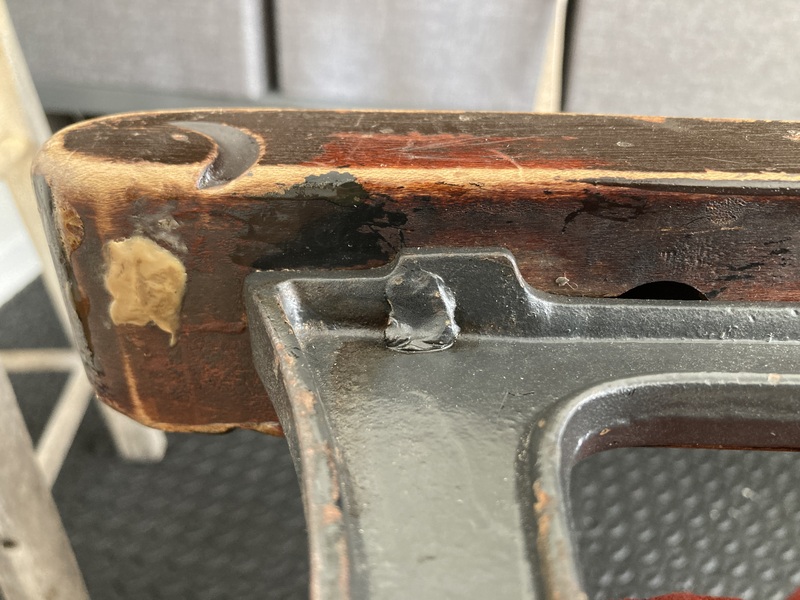
There were a few things we decided was not in scope for this project. Stripping the rust and touching up the paint? Maybe another time. Refinishing the arm rests? We’d ruin the patina. Remove the painted-in gum? Nonsense—that’s how you can tell it’s authentic!
Here is a photo of the finished chair, taken 10 minutes before delivery:
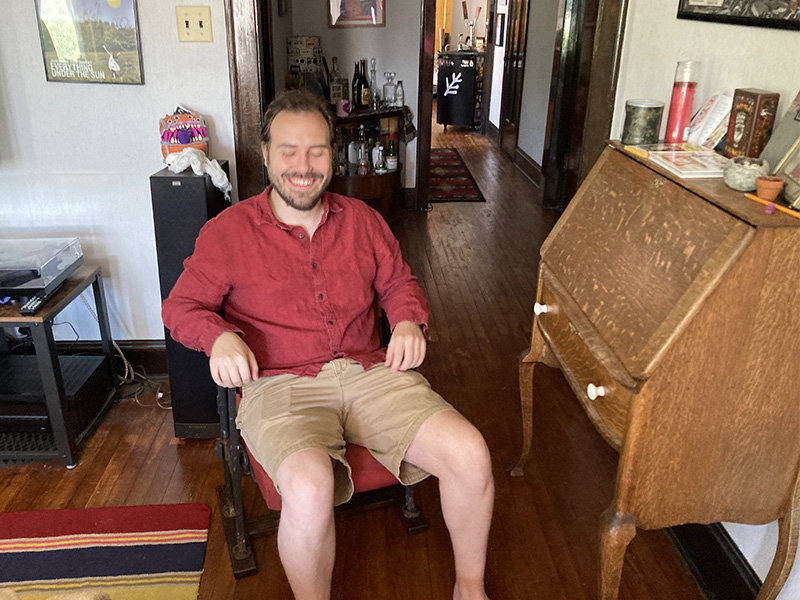
Here’s the owner with his new chair, cheesin':
It was neat to work on a piece of Chicago history.
Lessons learned? I mean, I already knew this, but dang, everything takes so much longer than expected. Doesn’t matter the field. You look at a project like this and think, “It’s three pieces of wood, how hard can it be?” But it’s so much more than that. Yes, experience will help you anticipate problems, but you can never predict everything that will need to be done.
Crucially, it’s not about things going wrong—at least not in the sense of making mistakes. None of the mistakes I made during this project cost me any time. It’s also not about how one defines done, or what is good enough. Dwelling on that is a trap. You can always cut corners midway to save time. Why do anything at all?
It’s about unknown unknowns: you cannot know all the challenges you’ll encounter until you are actually doing the project—peeling back the layers of whatever systems you’re working with, discovering all the problems underneath, and encountering unexpected interactions. If you could, they wouldn’t be challenges.
Yes, this article is actually about software development.
Also, throw away your old shellac. Just toss it. Or you may wish you did.